By: Team AY1920S1-CS2103-F09-1 Since: Oct 2019 Licence: MIT
- 1. Introduction
- 2. Quick Start
- 3. User Preferences
- 4. Features
- 4.1. Viewing help
help - 4.2. UI Display
display - 4.3. Importing existing availabilities
import - 4.4. Add interviewees/interviewers manually
add - 4.5. Edit interviewees/interviewers manually
edit - 4.6. Delete interviewees/interviewers manually
delete - 4.7. Clear all data
clear - 4.8. Scheduling the interviews
schedule - 4.9. Sending of email
email - 4.10. Exporting of interview schedule
export - 4.11. Get interview schedule
get[Coming in v2.0] - 4.12. Tag interview slot
tag[Coming in v2.0] - 4.13. Recording of additional statuses:
record[Coming in v2.0]
- 4.1. Viewing help
- 5. FAQ
- 6. Command Summary
- Appendix A: TIP: Converting an Excel file to .csv format
1. Introduction
Due to vastly different timetables, scheduling interviews that don’t clash for applicants to positions in an NUS
Co-Curricular Activity (CCA) during peak recruitment period can be difficult. Scheduler is an app that can automate this scheduling of interviews for
secretaries in NUS CCAs. Given templates adapted from exported NUSync CCA sign-up lists, Scheduler generates an optimal
matching of interviewees to time slots. Scheduler also supports manual input. It is optimised for people who prefer
typing in a Command Line Interface (CLI) to quickly access the functionality of an app.
Click on Quick Start to get started!
2. Quick Start
This guide shows you how to import your interviewees details and interviewers availability into Scheduler to begin managing your interview schedule. It also shows you basic tips on how to add or delete and edit interviewers/interviewees based on your changing needs.
2.1. Import your csv file into the application
To begin, let’s download sample interviewers availability and interviewees details in comma-separated value (.csv) format and import the data into Scheduler.
Sample/Template of Interviewer’s Availability and Interviewee Details
-
Interviewers' availability: http://bit.ly/interviewerTemplate
-
Interviewees' details: http://bit.ly/intervieweeDetails
Type import interviewer fp/FILE_PATH to import interviewers availability. To import interviewees details, type
import interviewee fp/FILE_PATH . FILE_PATH is the full/absolute file path to where the interviewers availability or
interviewees details .csv file is located.
When you have imported interviewers' availability, you will see that the interviewer’s availability are displayed as tables in the Schedules tab. In the tables, there will be cells with 1 and 0s. 1 means that the interviewer of that column is available for interview at that particular time slot (the time slot is at the leftmost column on the same row where the 1 is located), otherwise is 0. The imported interviewers details will also be displayed in the Interviewers tab.
2.2. Manually add interviewees and interviewers
Forgot to include some data before importing? No problem!
To add an interviewee, use the add command. The interviewee will then be displayed in the Interviewees tab.
Here we add an interviewee with the following characteristics:
-
Name - John Doe
-
Phone number - 91234567
-
Faculty - School of Computing
-
Year of study - 2019
-
Department of interest - Marketing
-
Personal Email - john_doe@gmail.com
-
Work email (should be an NUS email) - john_doe@u.nus.edu
-
Preferred time slots - 17/10/2019, 1pm to 2pm
add interviewee n/John Doe p/91234567 f/School of Computing y/1 ep/john_doe@gmail.com ew/john_doe@u.nus.edu d/Marketing s/17/10/2019 13:00-14:00
-
Note that all fields specified above are compulsory when adding an interviewee manually.
-
Please also note that the added interviewee cannot be already present in the application data, ie. no duplicates are allowed.
-
Similarly, to add an interviewer with the characteristics:
-
Name - Bohn Coe
-
Phone number - 9765421
-
Work email (should be an NUS email) - bohn_coe@u.nus.edu
-
Department - Marketing
-
Available time slots - 17/10/2019, 1pm to 2pm
add interviewer n/Bohn Coe p/97654321 ew/bohn_coe@u.nus.edu d/Marketing s/17/10/2019 13:00-14:00
-
Again, the fields specified above are *compulsory when adding an interviewer manually.
-
Please also note that the added interviewer cannot be already present in the application data, ie. no duplicates are allowed.
-
The added interviewer will be displayed in the Interviewers tab.
2.3. Schedule interviews
Type schedule in the command line of the application. Scheduler will then schedule the interviews for you and the result
will be displayed in the Schedules tab! If an interviewee is allocated a time slot, the name of the interviewee will be displayed
in one of the tables in the Schedules tab depending on which slot is allocated to him/her.
At the cell which displays the interviewee’s name, the time slot allocated to it is on the leftmost column of the same row, and the interviewer that will be interviewing him/her is the name displayed beside the department in the first row of the same column.
2.4. Email Interviewee
Want to email the allocated time slot to an interviewee? Simply type email ct/timeslot n/INTERVIEWEE NAME, replacing
INTERVIEWEE NAME with the name of the interviewee.
2.5. Export Scheduled Result
Now let’s export the scheduled result to an external .csv file! Simply type export fp/FILE_PATH, replacing FILE_PATH with the full/absolute
path to your target destination of the .csv file. If the .csv file has not exist, Scheduler will create the exported result file
at the target destination you specify in FILE_PATH!
That’s all for the quick start, hope you enjoy using Scheduler!
3. User Preferences
Scheduler is initialised with default user preferences.
If you wish to make changes to the user preferences, do the following steps:
-
Step 1: Run scheduler.jar at least once. You should notice new files added to the folder containing the application.
-
Step 2: Open preferences.json using any word editor, eg. notepad.
-
Step 3: Edit the relevant user preference fields.
The details of each user preference field is explained further in the following sections.
3.1. Working Hours
Each time slot that an interviewer or interviewee indicates, must be within the startTime and endTime of the pre-defined
working hours for it to be displayed in the schedules.
Format:
startTime and endTime are defined as strings. It has to follow the string format "HH:mm".
Default values:
startTime: "10:00"
endTime: "21:00"
3.2. Duration of Timeslot
Each time slot that an interviewer or interviewee indicates, must be strictly of this pre-defined duration in the user preference for it to be
displayed in the schedules. This duration will also determine the number of timeslots daily, each with the indicated duration, from the startTime to endTime of pre-defined Working Hours.
It is represented by duration in the user preference file.
Format:
duration is defined as a positive integer representing the number of minutes of each time slot.
Default values:
duration: 30
When adding interviewees or interviewers manually into Scheduler, the timeslots provided must have a duration (in minutes) that matches duration.
In addition, the timeslots indicated must also strictly follow the start and end times of each time slot. Refer to the example below for a clearer idea.
|
Example:
User preference:
startTime: "10:00"
endTime: "21:00"
duration: 30
Result:
Timeslots generated:
10:00-10:30, 10:30-11:00, 11:00-11:30, .... , 20:00-20:30, 20:30-21:00
//Timeslots are 30min intervals from 10:00 (startTime) to 21:00 (endTime)
As seen in the example above, timeslots are unique 30min intervals from the start to the end time of the Working Hours (10:00 to 21:00). There is no overlap between timeslots. If the indicated duration is not divisible by the Working Hours, the last timeslot generated will be before the end time indicated.
| The indicated timeslots, in adding or importing interviewers/interviewees, has to be one of these unique timeslots and cannot take any other values. Failure to do so will result in an inaccurate display of schedules. |
4. Features
Command Format
-
Words in
UPPER_CASEare the parameters to be supplied by the user. -
Items in square brackets
[]are optional. -
Items with
…after them can be used multiple times, including zero times. -
Parameters can be in any order. E.g if a command specifies
n/NAME p/PHONE, passing the input asp/PHONE n/NAMEis also acceptable. -
Example:
add interviewee n/NAME p/PHONE f/FACULTY y/YEAR_OF_STUDY ep/PERSONAL_EMAIL ew/NUS_WORK_EMAIL d/DEPARTMENT… s/SLOT… [t/TAG]…-
NAME,PHONE,FACULTY,YEAR_OF_STUDY,PERSONAL_EMAIL,NUS_WORK_EMAIL,DEPARTMENT,SLOTandTAGare to be supplied by the user.-
Valid input:
add interviewee n/John Doe p/88888888 f/School of Computing y/1 ep/john_doe@gmail.com ew/john_doe@u.nus.edu d/Marketing s/17/10/2019 13:00-14:00 t/friends -
t/friendsis optional, and can be omitted from the command. -
Multiple tags can be supplied as input in place of just
t/friends:t/friends t/strong t/likesDogs
-
-
4.1. Viewing help help
Shows helpful information on using this software.
Format: help
4.2. UI Display display
4.2.1. Display Schedules
Display multiple tables that consist information of the schedules generated in a day format. The columns will show the date of the schedule followed by the interviewers and their respective departments. The rows consists of the time slots as well as names of the interviewee.
Format: display schedule
Notes: * You are also able to toggle to display schedule by clicking on the Schedules tab.
Constraints:
-
The command must be exactly the same as the format.
4.2.2. Display Interviewee
Display information of the interviewees in a table format.
Format: display interviewee
Notes: * You are also able to toggle to display schedule by clicking on the Interviewee tab.
Constraints:
-
The command must be exactly the same as the format.
4.2.3. Display Interviewer
Display information of the interviewers in a table format.
Format: display interviewer
Notes: * You are also able to toggle to display schedule by clicking on the Interviewer tab.
Constraints:
-
The command must be exactly the same as the format.
4.2.4. Differentiating the importance of timetable slots through colours [Coming in v2.0]
To edit time slots and change their colour so to show the importance of that slots. There are 3 importance: Low, Medium and High.
Format: change s/SLOT IMPORTANCE
Example: change s/17/10/2019 13:00-14:00 medium
4.3. Importing existing availabilities import
2 types of data can be imported - interviewers' availabilities and interviewees' details. Both of these details needs to be in CSV format and must follow the format given in the templates below. These templates were adapted versions of NUSync’s interview sign up excel sheets. The templates for the import commands can be found here:
| If you wish to import a new set of data of the same type, we strongly recommend that you use the Clear command to clear pre-existing data before re-importing newer data. This is because Scheduler does not allow duplicate persons, for both interviewer and interviewee. Unless you are very certain that the the second import does not contain any duplicate data, we would suggest that you run the 'clear' command beforehand. |
Constraints:
-
Data in .csv file must follow the settings defined in the user preference file. View User Preferences if you wish to change the default settings.
-
Data to be imported should only be in English and should strictly follow the format of the templates given above, e.g. format of headers and timeslots.
4.3.1. Importing interviewers’ availability
Imports interviewers’ availability from a comma separated values (CSV) file. After import command is ran, the GUI should display the imported data.
| The schedule displayed will only show timeslots within the Working Hours and Duration that the user has specified. |
Key formatting information for Interviewer’s Data:
-
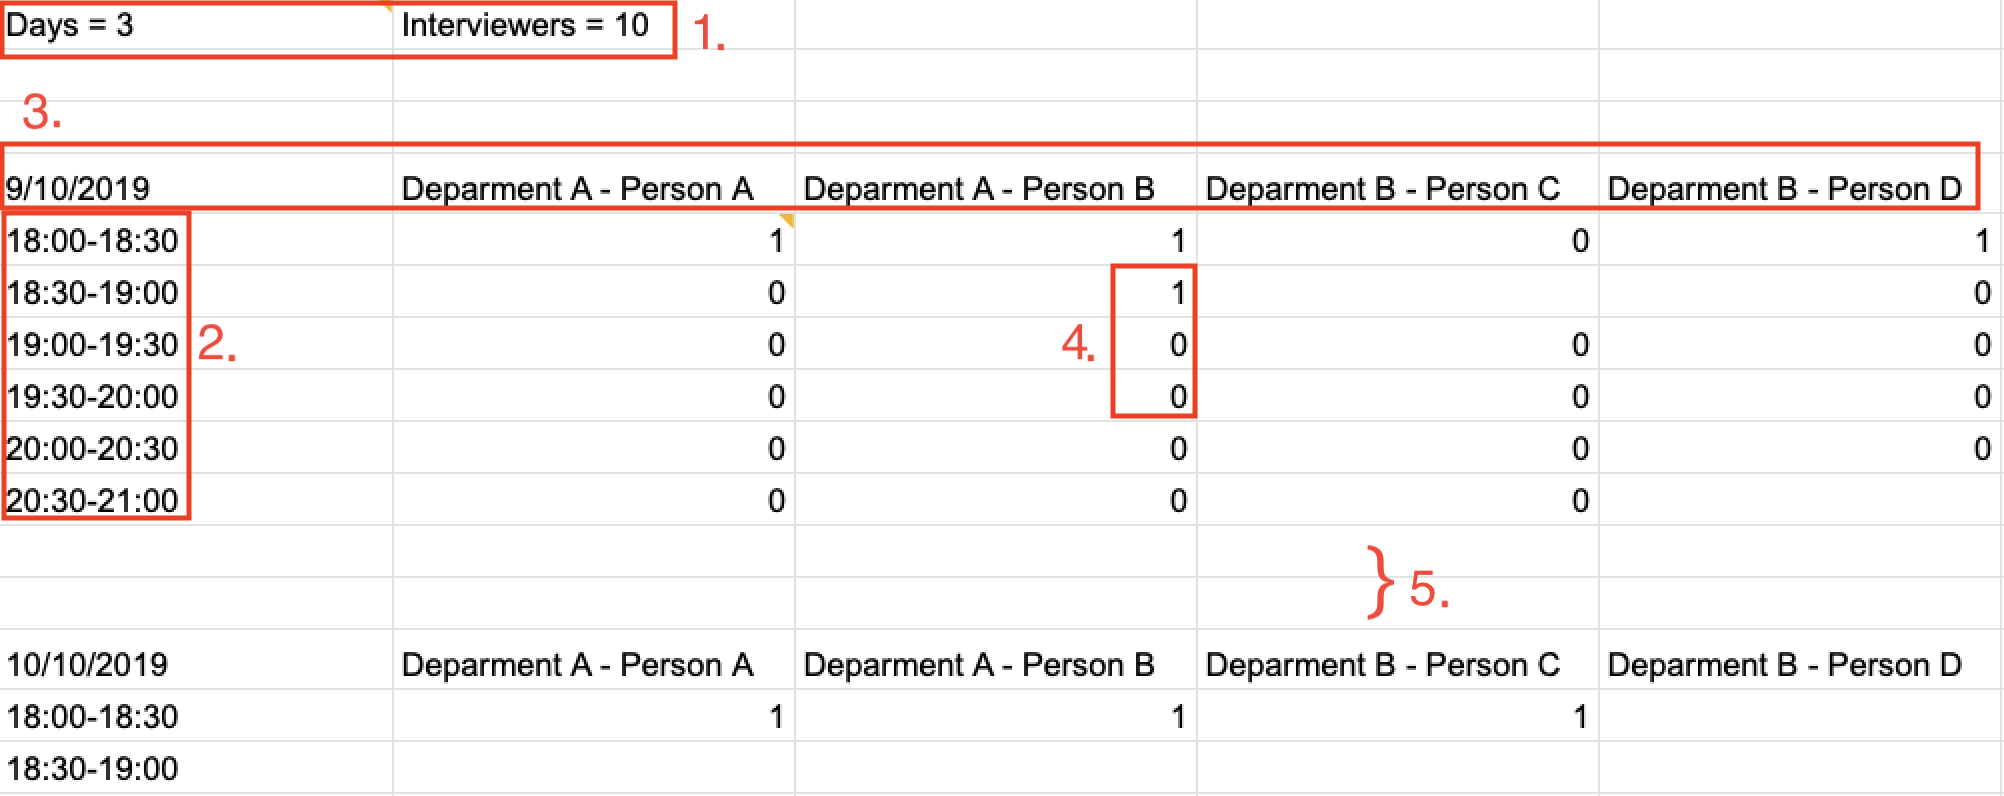
1. The top left corner of the .csv file consists of 2 attributes which are
DaysandInterviewers.-
Daysis the number of days in the .csv file which is equal to the number of tables in the .csv file. Each table represents the availability of the interviewers in 1 day. -
Interviewersis the number of interviewers in the .csv file. Each interviewer must exist in every table in the .csv file regardless of whether the interviewer is not available for that entire day.
-
-
2. The first column of each day’s schedule will consist of the timeslots for that day. Each timeslot should also be in the format
HH:mm - HH:mm.-
Time slots must obey the allowed values that are specified in the User Preferences.
-
-
3. The leftmost header in the first row of a table should indicate the date of the schedule. The subsequent headers of the first row should indicate the interviewers details in the format of
DEPARTMENT - INTERVIEWER’S_NAME.-
Except the date, the first row, which are the interviewers details, of every table in the .csv file needs to be the same.
-
-
4. A "1" in a timeslot represents that the interviewer in that column is available and "0" represents that he/she is unavailable for that particular timeslot.
-
5. Separation of different tables is made by leaving 2 empty lines after the end of every table.
Format of command: import interviewer fp/FILE_PATH
- FILE_PATH needs to be of .csv extension
- E.g. C:\\Users\Bob\file.csv
Example:
import interviewer fp/C:\Users\johndoe\Interviewers.csv
Constraints:
-
Duplicate entries of the same interviewer (same name) cannot be presented in the CSV file to be imported.
-
If none of the interviewers are available for a particular day, e.g. all "0" for all timeslots on that day, the GUI will not display the schedule for that day.
4.3.2. Importing interviewees’ availability
Imports interviewees’ availability from a comma separated values (CSV) file.
| There will be no changes in the schedules tab after the import of interviewee’s data. The changes will be made after Schedule command has been ran. |
Key formatting information for Interviewee’s Data:

-
The first row specifies the details of the Interviewee to be imported. The order of the headers in the first row must be strictly followed as shown in the above template.
-
The constraints of the interviewee details(i.e. format) in Add/Delete/Edit command also applies to the interviewee details in the imported data as well.
-
Timeslots: Each timeslot should be in the format
dd/MM/yyy HH:mm - HH:mm. Use commas to separate the timeslots if there are more than 1. Timeslots must obey the allowed values that are specified in the User Preferences. -
There can only be 1 unique value for all other fields. Commas should not be used in these fields.
Format: import interviewee fp/FILE_PATH
- FILE_PATH needs to be of .csv extension.
- E.g C:\\Users\Bob\file.csv
Example:
import interviewer fp/C:\Users\johndoe\Interviewees.csv
Constraints:
-
Duplicate entries of the same interviewee cannot be presented in the CSV file to be imported.
4.4. Add interviewees/interviewers manually add
Manually add a new entity to the database. The command format differs on the preamble supplied, which should be interviewee or interviewer:
-
If
intervieweeis supplied, refer to Adding a new interviewee below. -
If
intervieweris supplied, refer to Adding a new interviewer below.
4.4.1. Adding a new interviewee
Manually add a new interviewee to the database.
Format: add interviewee n/NAME p/PHONE f/FACULTY y/YEAR_OF_STUDY ep/PERSONAL_EMAIL ew/NUS_WORK_EMAIL d/DEPARTMENT… s/SLOT… [t/TAG]…
Example:
add interviewee n/John Doe p/91234567 f/School of Computing y/1 ep/john_doe@gmail.com ew/john_doe@u.nus.edu d/Marketing s/17/10/2019 13:30-14:00 t/friends
Notes:
-
If a name prefix
n/is supplied, theNAMEgiven should not match (case-insensitive) that of other interviewees already in Scheduler.-
John DoitandJohn Do itare considered different names.
-
Constraints:
-
A
n/NAMEmust only contain alphanumeric characters and spaces, and should not be blank. -
A
p/PHONEmust only contain numbers, and should be at least 3 digits long. -
A
f/FACULTYcan take any value in English, but should not be blank. -
A
y/YEAR_OF_STUDYmust be a positive integer within the range [1,5]. -
A
ep/PERSONAL_EMAILorew/NUS_WORK_EMAILmust be of format local-part@domain.-
The local-part must only contain alphanumeric characters and special characters ( !#$%&'*+/=?`{|}~^.- ), excluding the parenthesis.
-
The domain name must at least be 2 characters long, start and end with alphanumeric characters and consist of alphanumeric characters, with a period or a hyphen for the characters in-between, if any.
-
-
A
d/DEPARTMENTshould be in English, and should not be blank. -
A
t/TAGmust only be alphanumeric and one word, i.et/catLoveris correct whilet/cat loveris not. -
s/SLOTmust follow the format:dd/MM/yyyy HH:mm-HH:mm, where dd/MM/yyyy refers to a date, the leftmost HH:mm refers to the start duration and the rightmost HH:mm refers to the end duration. -
The date dd/MM/yyyy must strictly be a valid date, i.e 30/02/2019 cannot be supplied as a date.
-
The start duration and end duration of a
s/SLOTmust follow these constraints:-
A start duration and end duration must be in 24-hour format.
-
The range of start durations and end durations available for input must be within Working Hours.
-
The start duration must be earlier than the end duration, and be in increments of
duration. The time elapsed from the start duration to end duration must also follow the number of minutes as specified by the value ofdurationin User Preferences. Otherwise, scheduled data will not be displayed properly in the user interface. See Duration of Timeslot for more details.
-
4.4.2. Adding a new interviewer
Manually add a new interviewer to the database.
Format: add interviewer n/NAME p/PHONE ew/NUS_WORK_EMAIL d/DEPARTMENT s/SLOT… [t/TAG]…
Example:
add interviewer n/Mary Jane p/98765432 ew/mary_jane@u.nus.edu d/Marketing s/20/09/2019 18:00-18:30
Notes:
-
If a name prefix
n/is supplied, theNAMEgiven should not match (case-insensitive) that of other interviewers already in Scheduler.-
John DoitandJohn Do itare considered different names.
-
Constraints:
-
A
n/NAMEmust only contain alphanumeric characters and spaces, and should not be blank. -
A
p/PHONEmust only contain numbers, and should be at least 3 digits long. -
A
ew/NUS_WORK_EMAILmust be of format local-part@domain.-
The local-part must only contain alphanumeric characters and special characters ( !#$%&'*+/=?`{|}~^.- ), excluding the parenthesis.
-
The domain name must at least be 2 characters long, start and end with alphanumeric characters and consist of alphanumeric characters, with a period or a hyphen for the characters in-between, if any.
-
-
A
d/DEPARTMENTshould be in English, and should not be blank. -
A
t/TAGmust only be alphanumeric and one word, i.et/catLoveris correct whilet/cat loveris not. -
s/SLOTmust follow the format:dd/MM/yyyy HH:mm-HH:mm, where dd/MM/yyyy refers to a date, the leftmost HH:mm refers to the start duration and the rightmost HH:mm refers to the end duration. -
The date dd/MM/yyyy must strictly be a valid date, i.e 30/02/2019 cannot be supplied as a date.
-
The start duration and end duration of a
s/SLOTmust follow these constraints:-
A start duration and end duration must be in 24-hour format.
-
The range of start durations and end durations available for input must be within Working Hours.
-
The start duration must be earlier than the end duration, and be in increments of
duration. The time elapsed from the start duration to end duration must also follow the number of minutes as specified by the value ofdurationin User Preferences. Otherwise, scheduled data will not be displayed properly in the user interface. See Duration of Timeslot for more details.
-
4.5. Edit interviewees/interviewers manually edit
Manually edit an entity in the database. The command format depends on the r/ROLE prefix supplied:
-
If
intervieweeis supplied, refer to Edit an existing interviewee below. -
If
intervieweris supplied, refer to Edit an existing interviewer below.
4.5.1. Edit an existing interviewee
Manually edit an existing interviewee in the database.
Format: edit NAME r/interviewee [n/NAME] [p/PHONE] [f/FACULTY] [y/YEAR_OF_STUDY] [ep/PERSONAL_EMAIL] [ew/NUS_WORK_EMAIL]
[d/DEPARTMENT]… [s/SLOT]… [t/TAG]…
Notes:
-
An empty tag prefix
t/can be supplied to reset the tags of an interviewee. -
If a department prefix
d/is supplied, at least one valid, non-empty department must be provided. -
If a slot prefix
s/is supplied, at least one valid, non-empty slot must be provided. -
If a name prefix
n/is supplied, theNAMEgiven should not match (case-insensitive) that of other interviewees.-
John DoitandJohn Do itare considered different names.
-
Example:
edit John Doe r/interviewee p/91234567 f/School of Computing s/05/11/2019 18:30-19:00
Constraints:
-
The interviewee to be edited must exist in the Scheduler.
-
NAMEmust be provided aftereditand before the first prefixr/ROLE. -
At least one optional argument must be supplied, i.e
edit NAME r/intervieweeis not valid input. -
A
n/NAMEmust only contain alphanumeric characters and spaces, and should not be blank. -
A
p/PHONEmust only contain numbers, and should be at least 3 digits long. -
A
f/FACULTYcan take any value in English, but should not be blank. -
A
y/YEAR_OF_STUDYmust be a positive integer within the range [1,5]. -
A
ep/PERSONAL_EMAILorew/NUS_WORK_EMAILmust be of format local-part@domain.-
The local-part must only contain alphanumeric characters and special characters ( !#$%&'*+/=?`{|}~^.- ), excluding the parenthesis.
-
The domain name must at least be 2 characters long, start and end with alphanumeric characters and consist of alphanumeric characters, with a period or a hyphen for the characters in-between, if any.
-
-
A
d/DEPARTMENTshould be in English, and should not be blank. -
A
t/TAGmust only be alphanumeric and one word, i.et/catLoveris correct whilet/cat loveris not. -
s/SLOTmust follow the format:dd/MM/yyyy HH:mm-HH:mm, where dd/MM/yyyy refers to a date, the leftmost HH:mm refers to the start duration and the rightmost HH:mm refers to the end duration. -
The date dd/MM/yyyy must strictly be a valid date, i.e 30/02/2019 cannot be supplied as a date.
-
The start duration and end duration of a
s/SLOTmust follow these constraints:-
A start duration and end duration must be in 24-hour format.
-
The range of start durations and end durations available for input must be within Working Hours.
-
The start duration must be earlier than the end duration, and be in increments of
duration. The time elapsed from the start duration to end duration must also follow the number of minutes as specified by the value ofdurationin User Preferences. Otherwise, scheduled data will not be displayed properly in the user interface. See Duration of Timeslot for more details.
-
4.5.2. Edit an existing interviewer
Manually edit an existing interviewer in the database.
Format: edit NAME r/interviewer [n/NAME] [p/PHONE] [t/TAG]… [d/DEPARTMENT] [ew/NUS_WORK_EMAIL] [s/SLOT]…
Notes:
-
An empty tag prefix
t/can be supplied to reset the tags of an interviewer. -
If a slot prefix
s/is supplied, at least one valid, non-empty slot must be provided. -
If a name prefix
n/is supplied, theNAMEgiven should not match (case-insensitive) that of other interviewers.-
John DoitandJohn Do itare considered different names.
-
Example:
edit John Doe r/interviewer p/91234567 s/05/11/2019 18:30-19:00
Constraints:
-
The interviewer to be edited must exist in the Scheduler.
-
NAMEmust be provided aftereditand before the first prefixr/ROLE. -
At least one optional argument must be supplied, i.e
edit NAME r/intervieweris not valid input. -
A
n/NAMEmust only contain alphanumeric characters and spaces, and should not be blank. -
A
p/PHONEmust only contain numbers, and should be at least 3 digits long. -
A
ew/NUS_WORK_EMAILmust be of format local-part@domain.-
The local-part must only contain alphanumeric characters and special characters ( !#$%&'*+/=?`{|}~^.- ), excluding the parenthesis.
-
The domain name must at least be 2 characters long, start and end with alphanumeric characters and consist of alphanumeric characters, with a period or a hyphen for the characters in-between, if any.
-
-
A
d/DEPARTMENTshould be in English, and should not be blank. -
A
t/TAGmust only be alphanumeric and one word, i.et/catLoveris correct whilet/cat loveris not. -
s/SLOTmust follow the format:dd/MM/yyyy HH:mm-HH:mm, where dd/MM/yyyy refers to a date, the leftmost HH:mm refers to the start duration and the rightmost HH:mm refers to the end duration. -
The date dd/MM/yyyy must strictly be a valid date, i.e 30/02/2019 cannot be supplied as a date.
-
The start duration and end duration of a
s/SLOTmust follow these constraints:-
A start duration and end duration must be in 24-hour format.
-
The range of start durations and end durations available for input must be within Working Hours.
-
The start duration must be earlier than the end duration, and be in increments of
duration. The time elapsed from the start duration to end duration must also follow the number of minutes as specified by the value ofdurationin User Preferences. Otherwise, scheduled data will not be displayed properly in the user interface. See Duration of Timeslot for more details.
-
4.6. Delete interviewees/interviewers manually delete
Manually delete an entity from the database.
Format: delete NAME r/ROLE
-
If
intervieweeis supplied asROLE, refer to Delete an existing interviewee. -
If
intervieweris supplied asROLE, refer to Delete an existing interviewer.
4.6.1. Delete an existing interviewee
Deletes the specified interviewee from the database.
Format: delete NAME r/interviewee
Example:
delete John Doe r/interviewee
Notes:
-
An interviewee with the same name as the given
NAMEargument (case-insensitive) should exist in Scheduler.
4.6.2. Delete an existing interviewer
Deletes the specified interviewer from the database.
Format: delete NAME r/interviewer
Example:
delete Bohn Doe r/interviewer
Notes:
-
An interviewer with the same name as the given
NAMEargument (case-insensitive) should exist in Scheduler.
4.7. Clear all data clear
Clears both interviewee and interviewer data in Scheduler. Will not remove user preferences.
Format: clear
| Data erased cannot be undone! |
4.8. Scheduling the interviews schedule
Schedule and allocate interviewees to the available interview slots based on the availability of interviewees and their choice of department. The scheduled result will then be displayed in the Schedules tab of the UI of Scheduler.
Format: schedule
To ensure that the displayed scheduling result is always updated with the latest database of interviewers and interviewees,
add/delete/edit of interviewee or interviewer will remove the scheduling result, hence you will need to type schedule again.
|
4.9. Sending of email email
Constraints
-
A supported mail client should be installed on your machine. This mail client should be able to handle the
mailto:URI scheme. You can open your web browser and typemailto:test@example.comto verify if your machine has a supported mail client installed. -
In the software, an email is considered to be sent if the email dialog has successfully appeared on your screen. It does not recognise whether or not you have actually sent the email across the Internet successfully.
-
For all command types, the
schedulecommand must be run first, as an email dialog will only appear for interviewees that have slots allocated to them.
4.9.1. Sending of interview time slot to interviewee
Opens an email dialog containing the interviewee’s allocated interview time slot to a particular interviewee specified, including other details such as the interviewer and location.
Format: email ct/timeslot n/INTERVIEWEE NAME
Notes:
-
The email dialog will only appear if the interviewee’s email is present in the database and that the interview schedule has already been generated.
-
The email dialog will appear even if the interviewee has been emailed before.
-
The email dialog will also not appear if you do not have a supported mail client installed on your computer.
4.9.2. Sending of interview time slot to all interviewees
Opens an email dialog containing the interviewee’s allocated interview time slot to every interviewee, including other details such as the interviewer and location. A summary report is then generated at the end of the command execution.
Format: email ct/alltimeslot
Notes:
-
The email dialog will only appear if the interviewee’s email is present in the database and that the interview schedule has already been generated.
-
The email dialog will not appear if the interviewee has been emailed previously.
-
The email dialog will also not appear if you do not have a supported mail client installed on your computer.
4.9.3. Checking status of emails sent
Provides a summary report of the number of interviewees with emails sent and the total number of interviewees stored in the database.
Format: email ct/status
4.9.4. Sending of interview results to an interviewee [Coming in v2.0]
Opens an email dialog containing the interviewee’s result/interview outcome and other details that you might want to include.
Format: email ct/results n/INTERVIEWEE NAME
4.10. Exporting of interview schedule export
Exports the allocated interview schedule timetable to the specified comma separated values (CSV) file.
Format: export fp/FILE_PATH
-
FILE_PATH is the path to the file.
-
E.g C:\\Users\Bob\file.csv
If FILE_PATH is a valid .csv file but does not exist, it will be created in the specified path.
|
Example:
export fp/C:\Users\johndoe\schedules.csv
Exported data format:
-
The exported data will follow the format of the schedules in 'schedules' tab.
-
Each schedule (table) will be separated from the previous by 2 empty lines.
-
Timeslots with "0" indicates that the interviewer is not available for the timeslot. Timeslots with "1" indicates that it is an available slot that has not been filled up by an interviewee.
-
Csv file can be converted into an excel file by following this guide - https://www.ablebits.com/office-addins-blog/2014/05/01/convert-csv-excel/.
Constraints:
-
This command requires the interview schedule to be generated first.
-
Although the specified filepath does not need to exist, it needs to be of .csv extension.
| The exported data will erase and replace all pre-existing data in the specified file. |
4.11. Get interview schedule get [Coming in v2.0]
Find an interviewer/interviewee and display his/her interview schedule.
Format: get NAME
Example:
get "John Doe"
4.12. Tag interview slot tag [Coming in v2.0]
Tags an interview slot with a name.
Format: tag TAG_NAME
User will also be able to filter by tags.
Format: filter tag TAG_NAME
4.13. Recording of additional statuses: record [Coming in v2.0]
4.13.1. Recording of interviewee’s attendance
Bring up the window to record the attendance of interviewees. You can navigate through the table in the window (GUI) using the directions key to record the attendance of the interviewees. Hit Enter at the target cell to record the attendance.
Format: record attendance
4.13.2. Recording of interview result
Bring up the window to record the interview result. The way to record the result is the same as 2.12.1.
Format: record result
4.13.3. Ranking of interviewees
Bring up the window to rank the interviewees. The way to record the result is the same as 2.12.1.
Format: record rank
5. FAQ
Q: Where can I download the application?
A: Check out the assets in our project release page https://github.com/AY1920S1-CS2103-F09-1/main/releases to download our latest releases!
6. Command Summary
| Command Description | Command Syntax |
|---|---|
Help |
|
Display schedule |
|
Display interviewee |
|
Display interviewer |
|
Import existing availabilities |
|
Add interviewee |
|
Add interviewer |
|
Edit interviewee |
|
Edit interviewer |
|
Delete interviewee |
|
Delete interviewer |
|
Clear imported data |
|
Schedule |
|
Email interviewee |
|
Export |
|
Filter |
|
Record |
|
Appendix A: TIP: Converting an Excel file to .csv format
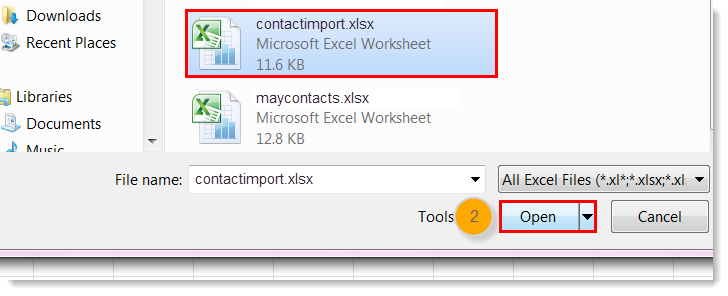
1) Open Excel and click File → Open.

2) In the dialog box, find the Excel file on your computer and click Open.
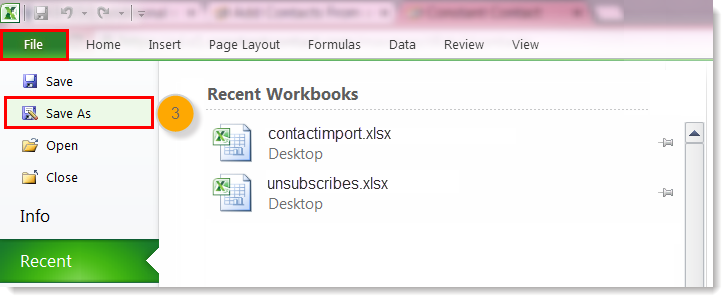
3) On the Excel toolbar, select File > Save As.
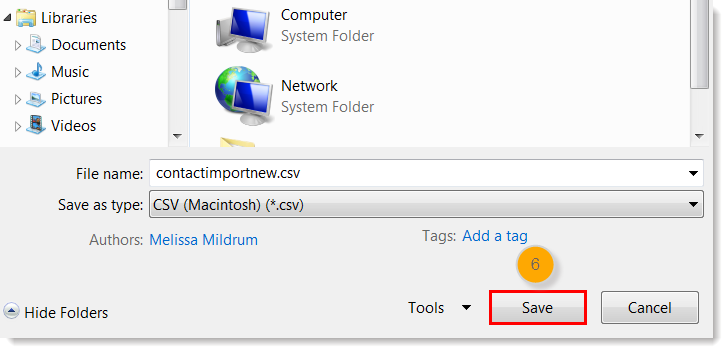
4) In the dialog box, type a new name for your file in the File Name field.
5) In the "Save as Type" drop-down menu, scroll down to locate and select CSV (comma delimited).

6) Click Save.
| Solution and images referenced from https://knowledgebase.constantcontact.com |